
For a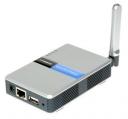 long time I’ve been looking for a print server so that I can access that Canon MF5xxx printer from the network, without resorting to leave a computer on all day (you know, via the regular shared printing mess). I finally managed to get the Linksys WPS54G (product description) from the local computer chain. It’s an older model so it is not too expensive (they go for 69 to 79 CDN). If you need access to a multi-purpose printer (you know the ones with faxing and scanning), you probably want to look for the WPM54 series of this device.
If you’re familiar with Linksys devices, the setup is always the same: generally, you grab an extra network cable, connect the device to your computer connect to the web-based configuration screen (using the default IP address, which is generally at 192.168.1.1, or the IP-address provided in the manual) and start changing settings. This isn’t true for the WPS54G: the default IP address is nowhere to be found in the manuals, so the only way to find out the device’s IP address is to start up the Print Server setup program and follow the on-screen instructions. I stopped halfway (right before it wants you to setup the wireless section) after the setup program revealed the Print Server’s IP Address (you guessed it, the device will look for a DHCP server first). This is where I changed the IP address and other settings straight from within the device’s web server (which will generally require a restart of your computer).
If you’re not familiar with networks and networking, the setup program will probably do for you, I guess: however, if you’ve found the IP address of the WPS54G, I’d recommend to assign a static IP address to this thing. You may need to make changes to your router, though.
The next step is to configure your desktop computers: there’s a portion in the setup program that will do this for you too but you can ignore that. If you’re on Windows, make sure that your computer’s workgroup matches the one you’ve setup on your print server. For all Windows versions, you generally go to Printers & Faxes, select ‘Add Printer’. When the Printer Wizard comes up select the ‘Local Printer attached to this computer’ (make sure to uncheck ‘automatically detect and install’). Then, ‘create a new port’ (type of port TCP/IP). In the next screen enter the IP address of the Print Server (use generic networking card/port), select the printer from the printer drivers list (notice that most likely your printer driver has already been installed because you have been printing to this printer before…) and then, print out your test page.
For the rest, the WPS54G works as promised in the flyers: it’s reasonably fast but it gets a bit hot though after printing a couple of jobs. You may also wish to upgrade to the latest firmware (you can download the latest firmware from here). You can configure a couple of goodies or ungoodies from within the device’s webpanel: I think I saw a couple of settings that allow you to send print jobs via e-mail, which may fill your uh, needs. And that’s basically it.
Nowadays, a lot of printer models come with networking capabilities. If you’re looking around for a new printer, it’s a good idea to consider one with an ethernet connection.
Feb 2nd, 2009: It looks like the WPS54G died on me. I’ll have to either look for the same model or see if I want to go look at the M version
Feb 4th, 2009: And here is the WPSM54G.