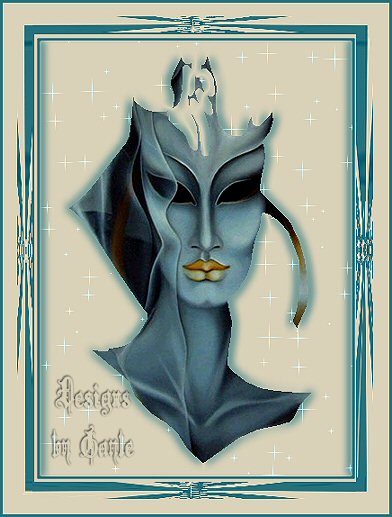
 Although simple, this is for the intermediate/advanced PSP user as I have only a few screen shots. But I also found out that trying is the best way to learn. *S* This tutorial was written by me and is ©momentzdesignz Any other tutorial that looks similar is purely coincidental and no infringement of any other artist is intended. For this tutorial you will need the following: PSP 8 Eye Candy 3 VM Natural - Sparkle - optional A tube your choice My tube is courtesy: Top Design Tubes
1 - Open your tube and Open a new transparent image 600 x 600
2 - Copy and paste your tube on to the transparent background as a new layer - [Layer #2] 3 - Foreground color set to a dark co-ordinating color from your tube 4 - Set your Background to Null 5 - New raster layer - [Layer #3] 6 - Preset Shapes tool: set to Rectangle, antialias checked and set width to 3 7a - Draw a border around your tube - [on layer #3] 7b - Select this border with your magic wand 8 - Still on layer 3, go to Effects > 3D effects > Inner bevel Settings: Preset Bevel #2, Width 31, Smoothness 44, depth 20, ambiance 11, shininess 34, color - white, angle 305, intensity 45 and elevation 30 9 - Selections > Select None 10 - Back to layer 1 and close it off for now 11 - Click on 1 of the other layers - Layers > Merge Visible 12 - With your magic wand, click any where on the transparent section inside the border, making sure you have selected all the transparent areas 13 - Flood fill inside the border with a color [lighter than your border] that compliments your image NOTE: This will be your main background color. 14 - Effects, Plugins > Eye Candy 3 > Chrome Softness 11, variation, 18, Contrast 69, bands 2 and light direction 342, Base color - your chosen dark color [gives you your shadow] and Highlight Color - Your light chosen color - [gives you your background] NOTE: (a)You can change any of these settings as you can now see what will compliment your image. (b) If you change your Softness and Variations amounts, you will have a more 'satiny' effect. 15 - Keep Selected 16 - Effects > Plugins > VM Natural > Sparkle Settings: Max size 29, red 103, green and blue 255, rnd color - 231 and random seed 116 17 - If you are happy with the stars, then click ok 18 - Selections > Select none 19 - Open layer 1 and go to: Layers > Merge Visible 20 - With your Selection tool, set to rectangle, draw around the outside border of your image 21 - Image > Crop to Selection Now for the framing and the Warp Effect NOTE: Here, when making the borders in our chosen colors, I set them to the chosen colors and then they don't have to be selected. 22 - Image > Add Border - 3 px, color - your light chosen color 23 - Image > Add border 10 px - your dark chosen color 24 - Image > Add Border - 25 px, color - your light chosen color 25 - Now we apply the warp on the 10 px dark border - See screen shot below for the basics of selecting 1 side.  26 - We will apply the Warp effect twice to make it close to the center of the image and on all 4 sides separately. Also, the wider the rectangle selection, the wider the warp effect :) So you are free to experiment or leave it as it ends up; either way it is a nice effect *S* 27 - As show in the screen shot, select your top dark border 28 - Effects > Distortion Effects > Warp Settings: H 21, V -4, size 60 and strength -70 29 - Keep selected 30 - Repeat the Warp Effect only *changing* the H to 0 31 - Selections > Select None 32 - Continue with the other 3 sides of the border, following steps: 27, 28, 29, 30 and 31 NOTE: I had a few stray pixels on the corners of the border after applying the warp effect, so I simply erased them :) 33 - Selections > Select none 34 - Image > Add Border - 3 px, color - your chosen dark color 35 - Selections > Select none 36 - Re-size, if necessary, add your watermark and save as a .jpg If you have any questions, please feel free to email me. ©momentzdesignz 1999 Below is her lovely result.  Back to Tutorials |