  This is a simple animated tutorial using a plugin. It can be done in any version of PSP. Please note, this page is graphic intense. This tutorial was written by me and is ©momentzdesignz Any other tutorial that looks similar is purely coincidental and no infringement of any other artist is intended. For this tutorial you will need the following: PSP - V8 Raindrop Tube - download Redfield's Plugin - Water Ripples - here NOTE: This is a free set of filters that comes with a few demos.
Step 1: Preparing your images.
1 – Start with a new 400 x 400 transparent image 2 - Flood fill with a pretty water color or water pattern. I chose the color blue #8892CE 3 - Layers > New raster layer 4 - Here we will add our name at the TOP of this image. I used a white fill and a small drop shadow. 5 - Layers > Merge All Flatten 6 - This is the main image we are using for the 4 images. 7 - Duplicate this image 3 times - so you have 4 in total 8 - Save each image and call them drop1.psp to drop 4.psp Step 2 - Adding the first raindrop 1 - Open your raindrop tube 2 - Working on image drop2.psp, copy the tube and paste it on this image as a new layer 3 - View > Ruler 4 - We want the raindrop just below our name on this image 5 - With your mover tool, keeping your co-ordinates approx. 185 across and 76 down to place your tube 6 - Refer to my finished sample above. 7 - Layers > Merge Visible Step 3 - Adding the first ripple and 2nd raindrop 1 - Now working on drop3.psp 2 - Effects > Plugins > Redfield > Water Ripples **See screen below: I have kept this large as the lettering and numbers are very small. :)  3 - Click ok when you have the setting - [I saved mine as I may want to use it again] 4 - Now we are going to add our raindrop as it has hit the water to make the ripple. 5 - View > Ruler 6 - Copy and paste your tube again as a new layer 7 - This one we want directly below the one at the top 8 - Using the Mover Tool, keeping the co-ordinates approx. 185 across the top and so it is halfway into the center of the ripple. 9 - It has hit the water so we will Erase the bottom part off, showing that it is almost there. [Since this is on its own layer, it is very easy to do] 10 - Layers > Merge > Merge Visible Step 4 - Adjusting the last image 1 - Now working on drop4.psp 2 - Effects > Plugins > Redfield > Water Ripples **See screen below: 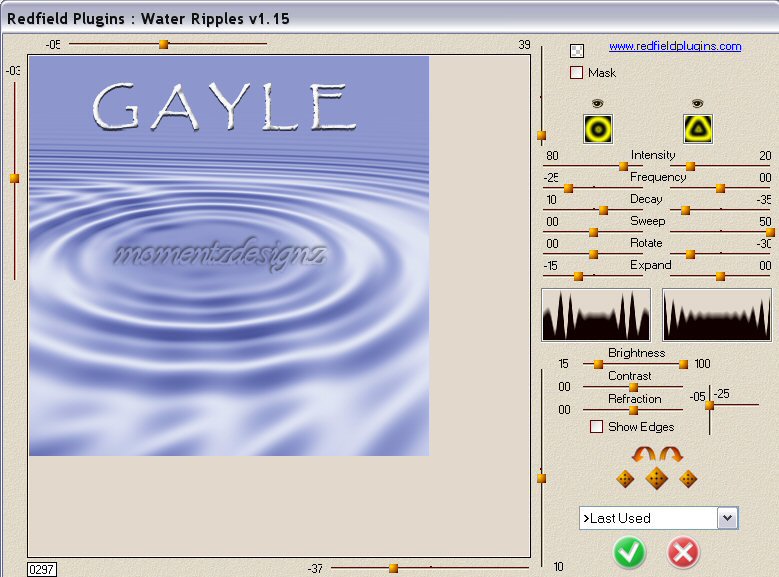 3 - This effect will give us the 'just splashed' effect :) This will make us ready for the animation. 4 - Again, save each of your 4 working images as your .psp files. Step 5 - The Animation 1 - Still in psp - go to: File > Jasc Software Products > Launch Animation Shop 2 - Go to: File > Animation Wizard ** The following will guide you through the next steps: 3 - Window 1 - check same size as the 1st frame 4 - Next: check 'transparent' 5 - Next: check - centered in the frame, with the canvas color and scale frames to fit 6 - Next: check - yes, repeat indefinably and put the number 60 in the box underneath 7 - Next: This is where you add your images. Remember we have 4. Go to: ADD and look for where you have them saved and click OPEN. Keep them in number order. 8 - Click the FINISH button NOTE: Now you will see your 4 frames on your work space. 9 - Go to: Tool Bar > View > Animation 10 - If you are happy with your raindrop tag, then it is time to re-size :) as it is quite large. 11 - Go to: Animation > Resize Animation > Resize > I resized mine by 50% This takes care of the whole animation. Step 4: Finishing 1 - On the Tool Bar > View Animation 2 - If you are happy with what you have, we will save it as a .gif 3 - File > Save As 4 - Give it a name and the .gif extension is already there 5 - Click > Save and since the program gives us the best optimization - just click . Next > Next > Finish If you have any questions, please feel free to email me. ©momentzdesignz 1999  Back to Tutorials |