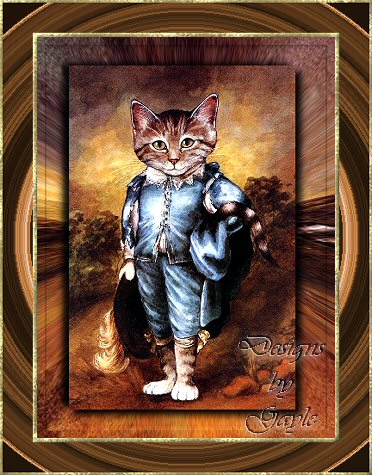
 Although simple, this is for the intermediate/advanced PSP user as I have no screen shots. But I also found out that trying is the best way to learn. *S* This tutorial was written by me and is ©momentzdesignz Any other tutorial that looks similar is purely coincidental and no infringement of any other artist is intended. For this tutorial you will need the following: PSP 8 VM Instant Art - Gradiator - download here Eye Candy 3 Textured Gold pattern  Image of choice NOTE: For this frame you will want a more centered image as we will be making our frame on the leftover background. Also, we have found in testing that there needs ammendments if you are using a lighter image so there are "Ammended Notes" in the areas below as necessary.
1 - Open your image, duplicate and close the original
2 - With your Selection Tool, draw a rectangle around the main center of your image 3 - Selections > Invert 4 - Effects > Distortion effects > Warp Settings: H 0, V -4, Size 100, Strength -70 5 - Selections > Invert 6 - Effects > Plugins > Eye Candy 3 > Drop Shadow Settings: Distance 10, blur 10, direction, 315, opacity 90, Color - black 7 - Keep selected and repeat Eye Candy drop shadow ONLY changing the Direction to 156 8 - Selections > Select none 9 - Image > Add border - 5 px - white 10 - Use Magic wand and select your border and flood fill with your gold pattern 11 - Effects - 3D effects > Inner Bevel Settings: Bevel #2, width 16, smoothness 40, depth 10, ambience 0, shininess 10, color - white, angle 315, intensity 49 and elevation 30 12 - Selections > Select none 13 - Image > Add border - 35 px, white 14 - Select the border with your magic wand 15 - Effects > Plugins > VM Instant Art > Gradiator Settings: Mode 87, Line 143, Hue 30 "Ammendent for lighter image" (a)Apply the Gradiator filter > adjust settings to suit your graphic (b)Adjust>Blur>Gaussian Blur >Adjust to suit your graphic 16 - Click ok and Keep Selected 17 - Effects > Artistic Effects > Aged Newspaper Amount to age - 10 18 - Keep Selected 19 - Adjust > Hue and Saturation > Colorize Settings: Hue 20 and Saturation 136 20 - Effects > 3D Effects > Outer Bevel Bevel #5, width 20, smoothness 5, depth 22, ambience -3, shininess 11, color - white, angle 1, intensity 43 and elevation 36 21 - Selections > Select none 22 - Image add border - 5 px, white 23 - Select border with magic wand 24 - Flood fill with your gold texture and keep selected 25 - Effects > 3D Effects > Inner bevel *Same settings as we used in #11 "Ammendent for lighter image" (a)Selections>Invert (b)Effects>3D Effects>Cutout (c)Use these settings--V & H-2, O-87, B-12 (d)Repeat Cutout, but change V & H to -2 26 - Selections > Select none 27 - Re-size, add your watermark and save as a .jpg If you have any questions, please feel free to email me. ©momentzdesignz 1999 Below is her result using the options for a lighter graphic. 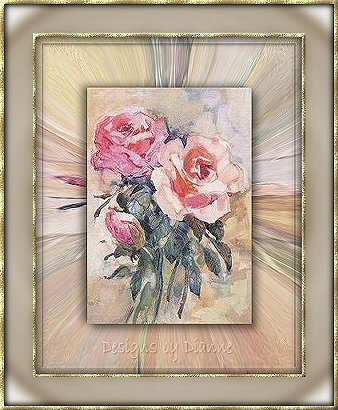 Back to Tutorials |