Silhouette Tag

PSP 7 - Intermediate Level
Supplies Needed:
Silhouette Tube
Bold colored Gradient of choice
Filter Factory Gallery H
Filter Factory Gallery J
1) Open Tube, Duplicate, Close original.
2) Open New Transparent Image 300 x 350 pixels, flood fill with gradient, New Raster Layer.
3) Right Click on blue bar at top of Silhouette Tube, Left click Copy.
4) Activate Flood filled background.
**Right Click on blue bar at top, Left Click on Paste> Paste as New selection**.
With Mover Tool position at top left hand corner. Do not Deselect.
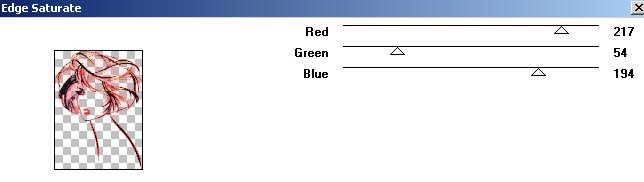
5) Effects>Filter Factory Gallery H>Edge Saturate, see screen shot.
Deselect and add New Raster layer.
6) Activate Silhouette Tube> Image Mirror. Copy as in step 3 and paste onto background image as in step 4.
7) With Mover tool place to the right and below first image. Deselect.
8) Again, take your tube and Right Click on blue bar at top, Left Click on Paste as New selection.
With Mover Tool position at bottom left hand corner. Do not Deselect.
9) Go to Layer Blend Mode> Darken.
10) Repeat Step 3.
11) Repeat step 4 from ** to **. With mover Tool place in bottom left hand corner.
12) Effects Filter Factory J>Color Pattern Generator 2.
13) At this stage you can rearrange the silhouettes if necessary by
clicking on each layer and using the Mover Tool to reposition.
Remember that Layer 1 contains the background colour and should not be moved.
When you are satisfied with layout go Layer> Merge All Flatten.
14) Add Text as desired.
15) Add your watermark, Resize, Optimise and save as jpeg.
Thank you for doing my tutorial and hope you have enjoyed it!
This tutorial was tested by Gayle - here is her result.

Tutorials